
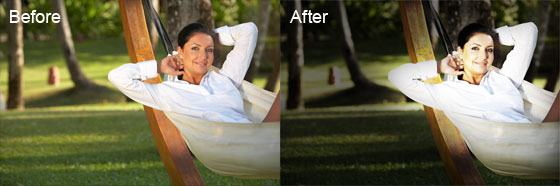
Make your photos interesting with this popular effect created from a combination of three photo effects. In this Photoshop tutorial, you'll learn how to create common photo effects that can be combined to simulate the trendy effect many photographers use on their photos.
Preview of Final Results
Trendy Neutral Photo Effect Photoshop Tutorial
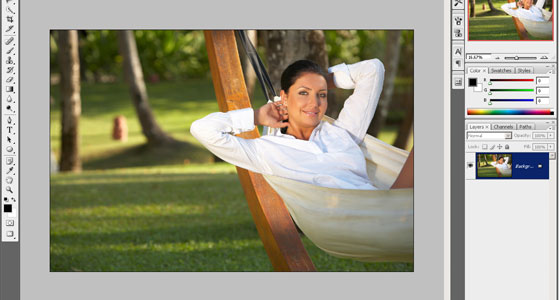
Step 1: Open an image into Photoshop
Open a photo into Photoshop. This photo should not have any strong photo effect applied.
Step 2: Add a neutral color effect
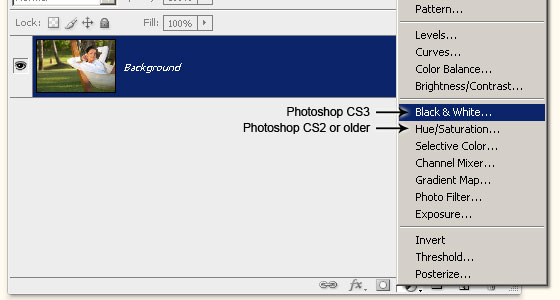
First, we'll add a neutral color effect. To do this, we'll need to create a new layer with a grayscale version of the image as the layers content. Instead of duplicating the layer and desaturating it, we'll be using adjustment layers instead. Adjustment layers are non-destructive, editable anytime, and they keep the Photoshop file size small.
In the Layers palette, click on the new adjustment layer button and choose Black & White. The Black and White option is only available in Photoshop CS3. If you are using Photoshop CS2 or older, choose Hue/Saturation instead.
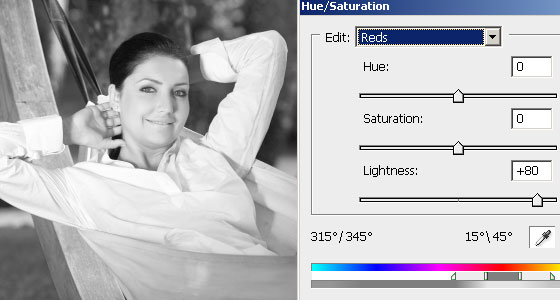
In the Black and White tool, adjust the settings to get the desired black and white effect you like. If you're using Photoshop CS2 or older and chose the Hue/Saturation tool instead, you can create a black and white image with the exact same options and results as the Black and White tool. Simply choose the color that you would like to edit and adjust the lightness. For example, if you want the reds to be brighter, choose "Reds" from the edit drop down menu and increase the lightness.
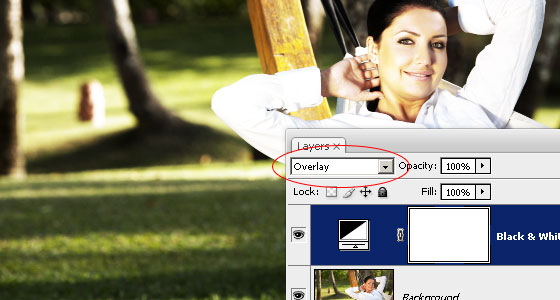
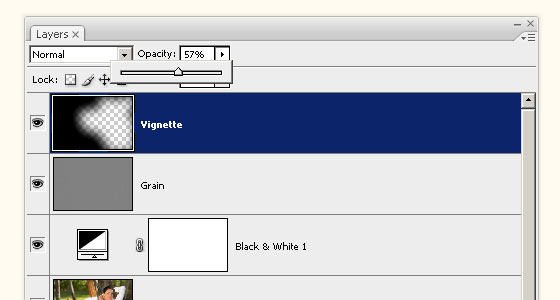
Change the blending mode of the new adjustment layer to Overlay. If you don't like the results, double-click on the layer icon to edit the settings again.
Page 2 of 2
Step 3: Add a grain texture
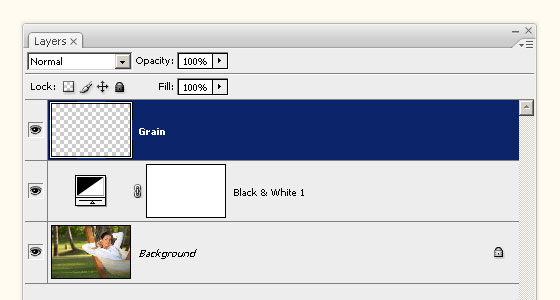
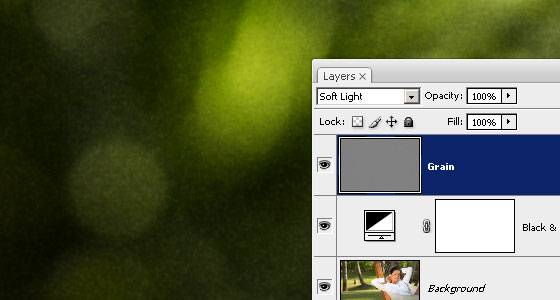
Now we're going to add a little artistic grain to the image. This is optional; you may skip this part if you don't want to add any grain to your image. First, create a new layer and name this layer "Grain".
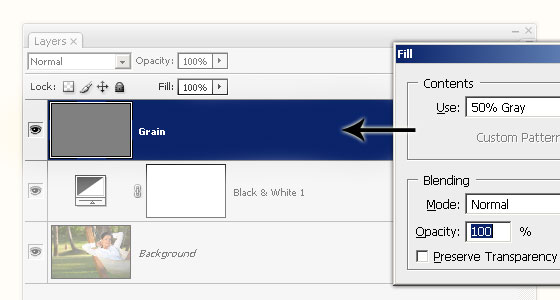
With the Grain layer selected, press Ctrl+F5 or choose Edit > Fill. In the Fill options, set the contents to 50% Gray and click OK. This will fill the layer with a 50% gray. We're using 50% gray as the base color because it appears transparent when used with certain blending modes.
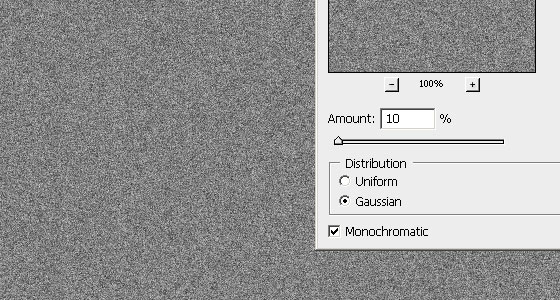
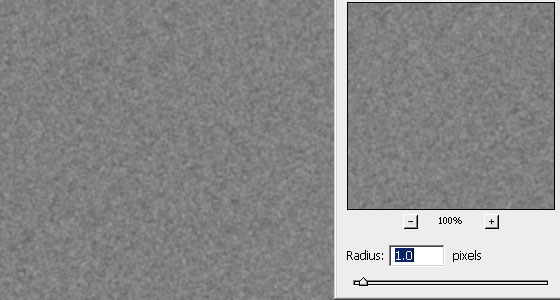
Now we'll add some noise. Choose Filter > Noise > Add Noise. Use the settings below.
The noise looks too sharp so we'll add a slight blur. Choose Filter > Blur > Gaussian Blur and use the settings below.
Change the blending mode of the Grain layer to Soft Light.
Step 4: Create an organic vignette
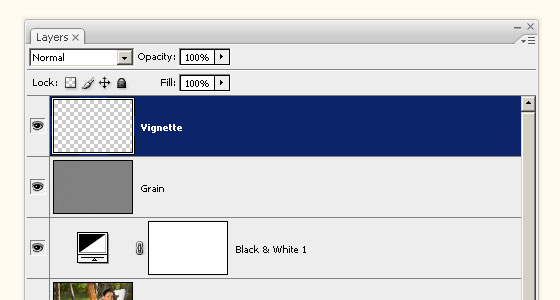
Finally, we'll add the last layer. This layer will contain a organic vignette that will increase focus to the subject. Begin by creating a new layer. Name this new layer Vignette.
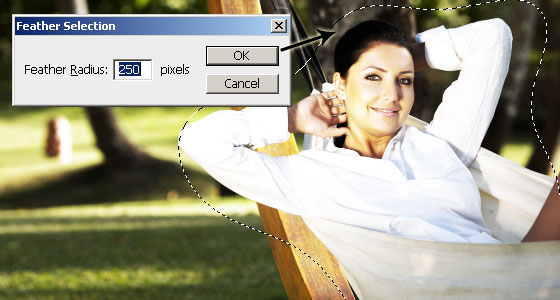
Select the lasso tool from the toolbar and create a round selection around the subject.

Choose Select > Modify > Feather. This will soften the edge of the selection. Input a radius setting to use. A larger radius will create softer edge. Depending on the dimension of your image, this setting will vary. I used a 250 pixels setting, which is the highest, for a 4992 x 3319 pixels image. If you enter in a radius that is too small or large, press Ctrl+Z to undo and try the Feather Selection tool again. This step may take several tries.
Create an inverse of the selection by pressing Shift+Ctrl+I or choosing Select > Invert. Now fill the selection with black and press Ctrl+D to deselect the selection.
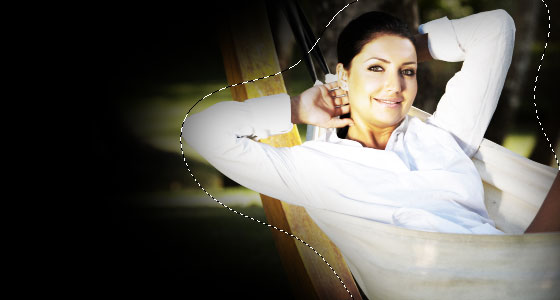
To finish this tutorial, reduce the opacity of the Vignette layer.
Final Results
Sample PSD
Download this free PSD (Photoshop Document) to view the final results with the layers.
trendy-neutral-photo-effect.psd
Baca juga artikel terkait :
Frame Sexy
Frame Photo Editor v5.0.0
15 Photoshop Plugins
Easy Watermark Creator 2.4
PhotoWiz Photoshop Plugin Series
Photo Collage 3.0
Photo Effects 2.25
AKVIS Retoucher 3.5
Portrait Professional 9.0
Nik Software Color Efex Pro™ 3.0
Tutorial Photoshop
download plugin photoshop
Photoshop tips
Tattoo Free
Manipulasi Foto Fantasy
Brush
25 Tutorials Belajar Photoshop Untuk PemulaDesighn 3D Text Effects
30 Photo Manipulasi Tutorials Untuk Photoshop
40 Excellent Photoshop Tutorials untuk Textures dan Backgrounds
Jangan Terjebak Mitos Seputar Kanker Payudara
Tips cara membuat bingkai dengan rectangular marquee tool

It is one of the impressive and interesting information to get this software and it has many impressive things to work with it. All Software Download
ReplyDelete